
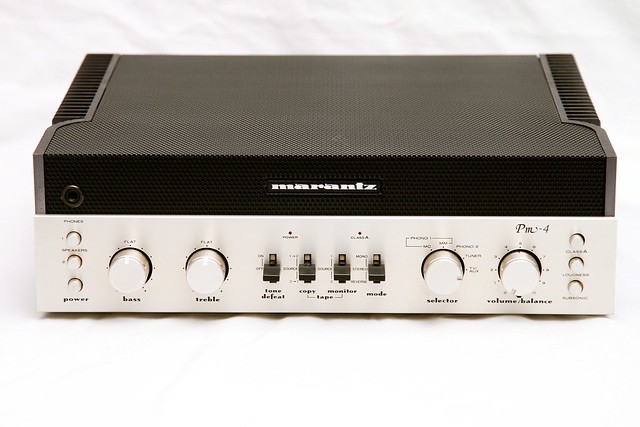
Well I thought I'd start with a classic. A Marantz Esotec series PM-4. This little beauty does 60 watts per channel in Class A+B, or hit the magic button and it does 15 watts per channel in pure Class A. It really doesn't sound like much, but when I crank this little beauty up a couple of notches you see people's faces light up. Then you tell them that it's only 15 watts and they just look dumfounded!
This amplifier is quite the statement. It had metal ribbed sides, from which the power amplifier transistors were directly connected to for convection cooling, steel mesh cover giving ample cooling. It still retained the champagne finish for the controls, and a wonderful symmetrical design.

I will admit, I did pay a bit too much for this little beauty. Especially for the state it was in. There was dust, rust and worst of all, leaking caps and corrosion. In fact when I first gave it a go, I was only getting sound in one channel and only if I tilted it to the right!
Dust:

Rust:

Leaking capacitors and corroded parts:

Pretty much the three things you don't want in an amplifier, especially one that runs as hot as any Class A amp will.
Disassembly.
This whole unit has not real 'structure to it. The sides/heatsinks are only held together by a couple of crossbeams and the front and rear plates. The mesh cover is all that hold the top half of the unit together. When working on this unit to clean the mica film and thermal grease, it's a bit of a balancing act to hold the unit on one side, remove the side panel do the servicing and then repeat for the other side. De-soldering parts underneath the crossbeams.. don't get me started!
Bottom view:
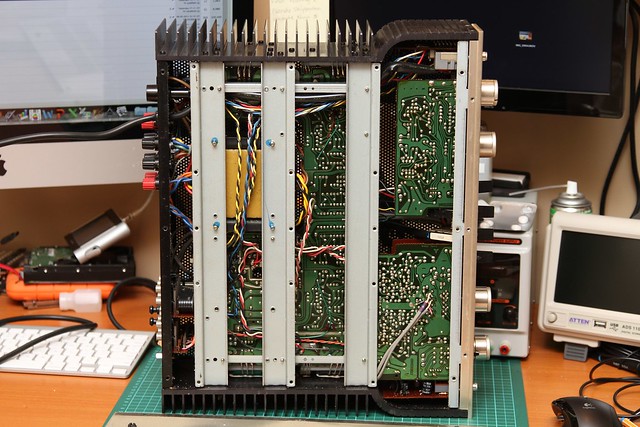
Side panel/heatsink removed:

Cleaning the side panel/heatsink:

Re-installed back onto the system:

Cleaning.
Like with any capacitors over 20 years old (sometimes it doesn't take even that long) they have started leaking. The major issue is the electrolytic fluid has spread on the board and caused numerous amounts of corrosion. Coupled with bad glue and a layer of dust for icing, it really doesn't help the situation.
Suspect: Leaking capacitor.
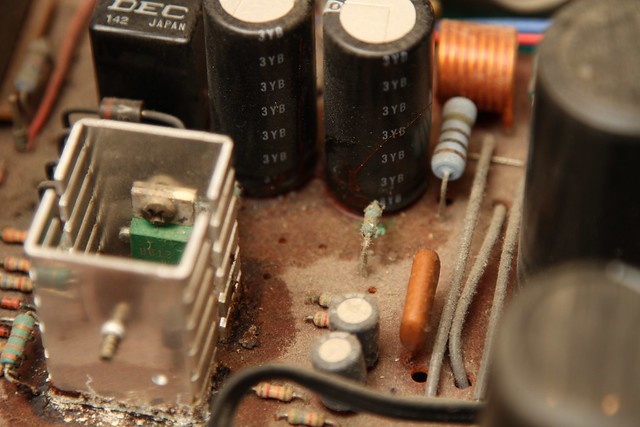
Birds eyeview of board:

Cleaned board with main filter caps replaced:

Dirty!

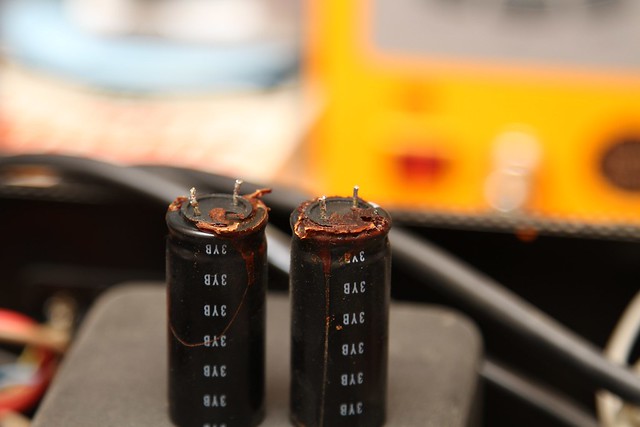
All done, all capacitors replaced!


The main filter capacitors were upgraded from 4x 6800uF to 4x 10,000uF. My capacitor of choice for filter caps is the Panasonic TS-HA series. For the other electrolytic capacitors I use "Panasonic: For Audio" AM series capacitors and if I can't get the values from those I use Panasonic FM series capacitors. It may sound like a bit of a sales push but I can promise you it is not. I use these because they're relatively easy to acquire, a good, reliable capacitor series made in Japan by a very reputable company and they are consistent performers. I *could* use capacitors from Elna, Nichicon, Rubycon and even BlackGates on occasion and by client request I do but for the cost and reliability of consistent quality and output values I like going to my Panasonic capacitors. I know it's a bit unorthodox but i've never had any issues with my methodology so far!
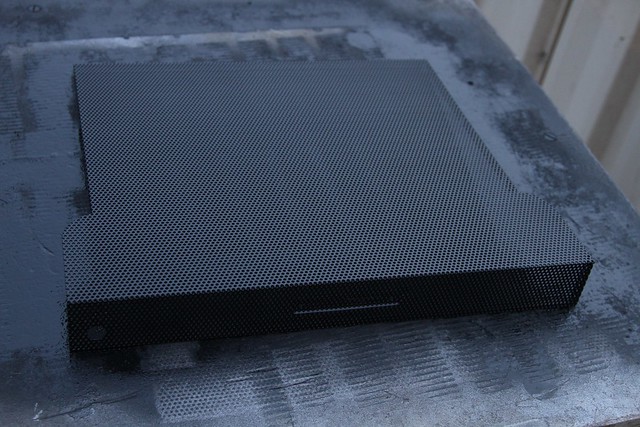
Rust.
The top cover was in a sad state, obviously something had been rubbing against the top cover and it showed signs of bending and paint chipping.
Using a wire brush angle grinder, all the paint was removed, a base coat of metal primer applied then three coats of high temperature engine cover paint applied in a matt black finish.

I was almost tempted to leave it with this look:

Finished result:
Final result.
Well after all of that, a fair bit of faceplate cleaning and a bit of metal polish the unit was complete. After a recalibration, the DC offset was running at a very nice 0.1v on both channels- can't complain!
Listening to this amp, it's not like the amps from Marantz that you expect to hear. The almost over-warmth of the 70's Marantz units(which personally I do quite enjoy) is not there. The result though is a very crisp sound with a hint of it's warmth roots. It takes some time to get accustomed to it but once you are you'll be spoilt :) I was not very happy at first listening to these, even changing speakers thinking that I needed to use something a bit more efficient, but once it grew on me I could not stop listening to it. In fact this is now my every day amp I listen to in my study (and I listen to as I type this entry).
If you can, get one. No question about it. You won't be disappointed.
Now for the modeling shots! I hope you have all enjoyed this first entry! There are more photos of the restoration on my flickr account here if you would like to have a look.


Oh my God, how beautiful it became!!!
ReplyDeleteNice-nice work!
I own a PM 4 myself and find it is a real beauty.
And its sound!
Excellent!
Nice site though! Congratulations!
Peter from Hungary
Hi there, nice work! I just recapped one of these suckers, it was dead. I am going to have to strip and paint the top of this one too. Thanks for the post. BTW, your flickr acct is private.
ReplyDeletei have one of these not restored but fully functional
ReplyDeleteI matched it with Anthony Gallo Acoustics....man its heaven....
ReplyDeleteDear Bonsaichop,
ReplyDeleteI have sent to you an email, I really need your help regarding the device.
Thank you.
Rgds/Duyet
This comment has been removed by the author.
ReplyDeleteThis comment has been removed by the author.
ReplyDeleteOn the off chance that you still look at and respond to comments here ... did you get any sense of how the headphone section was set up on this amp please? Does it run from the main circuit or does it have its own board?
ReplyDeleteMy marantz pm-4 is hoarse, the heatsink cant warm..
ReplyDeleteANy suggestion what i must be checked?
Thanks dude
Helo..
ReplyDeleteI have pm-4 too but the heatsink doesn't running hot or warm.
Any advice what must i do...
Thanks
Great reaad
ReplyDelete